Guest Post by Jo Anne Yada (a.k.a. Ms. Y)
I recently had the pleasure of collaborating with the fabulous Jennifer Serr, owner of The Sewing Room, to design a holiday window display. I wanted to highlight her business in a fun, festive, and vintage way to showcase the amazing creativity that represents her and her business. I wanted to do more than hang some lights and set up a tree; I wanted to give the message to all those walking by that this is indeed a creative space where you can make adorable sewing projects. And so I decided to make some vintage-inspired dolls out of sewing materials to add to the display.
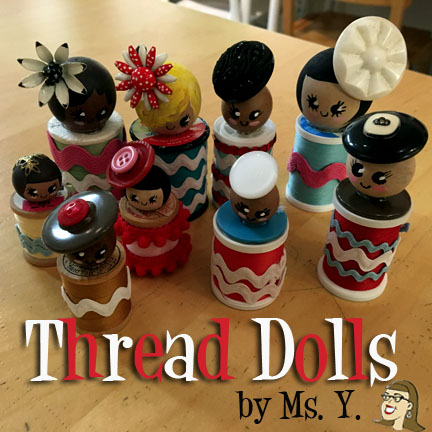
I made these Thread Dolls out of spools of thread, wooden beads, buttons, and trims (you know, sewing supplies).
Materials
Wooden beads
Spools of thread
Rick-rack in various sizes, sequin trim, pom pom trim, etc.
Vintage brooches & lost earrings
Buttons
Tools
Hot glue gun & hot glue sticks
Craft paint & brushes
The color scheme in the featured collection of dolls coordinates with the gorgeous dresses and apron that Jennifer made using sweet gingerbread print fabric and trims. The main colors were mint, soft pink, cyan, red, and brown, so I gravitated toward those choices. I learned at a class at The Sewing Room that vintage thread isn’t quite as strong as new thread for modern sewing, so I already had a stash of old spools of thread in my sewing box that I wasn’t going to use for sewing. I also thought to truly represent Jennifer’s esthetics, I should combine vintage items with new items, and thus I used new spools of thread in addition to the wooden vintage ones.
To begin, select your spools and beads. Place the beads on top of the spools and decide if the beads are the correct size or not. Smaller spools require smaller beads and larger spools require larger beads. Once you have the spools and beads paired up, it’s time to start painting.
Paint the skin colors on the beads and allow to dry. I used a small paint brush handle to hold the bead up with one hand while painting with the other. Carefully set down to dry completely before painting the eyes and details. Use a hair dryer to speed things up if you’d like. Don’t worry about the hole at the top of the head; we will glue something over it.
Paint a cute face carefully with a fine paintbrush. Add any kind of cheek, lip, eyes, etc. you like. You may want to paint hair as well. For a vintage style, paint finger waves, short bobs, bangs, etc.
While the paint dries, find the end of the thread and hot glue it in place so you won’t get a tail or the thread unravelling. I recommend doing this even if you slide the thread into the little notch on older spools or clamp them into place on newer spools.
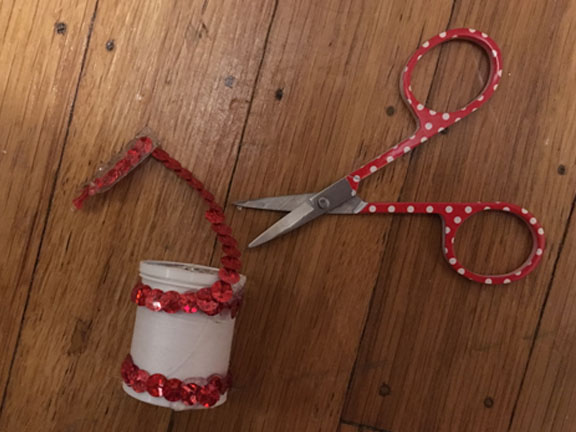
Decide how much trim each doll needs (one row, two, overlap, mix?) and attach one end of the trim to the back of the doll with hot glue, wrap around the front, then glue the other end down to the back, coming around full circle. There’s really no need to hot glue all the way around the circumference of the spool. Keep it as neat as possible. Always watch your fingers, too! You are working with small items and hot glue is super hot! Sometimes I think, “I’m an adult. I got this” just before I burn myself. Use a toothpick, chopstick, or other tool to use with your hot glue globs.
Decide which buttons/earrings/brooches will make great hats and start planning which doll will get to wear which “hat.” Do your planning before you hot glue so you can make a switch-a-roo if needed. You may also notice that the top of the spool of thread isn’t so lovely, in which case, find a flat button that’s the size of the top of the spool to hot glue down before adding the head.
Hot glue the heads onto the spools and allow to set. Now it’s time to add hats, accessories, buttons, etc. It’s also fun to find a teeny button to hot glue onto a larger button. Be creative with the accessories! Give the buttons a little tilt toward the front and off to the side, still covering the hole at the top.
Add additional globs of hot glue to make sure the hats stay in place, if needed. Finish up any additional details you’d like. Add teeny pom-poms, sequins, underwear elastic, lace, ruffles, etc. Now place them on display and enjoy!
Thanks so much Jo Anne! Those dolls are SEW Cute! Find out more about Jo Anne and Art with Ms. Y over on her website.
Until Next Time, Happy Crafting Holidays!
xo Jennifer


