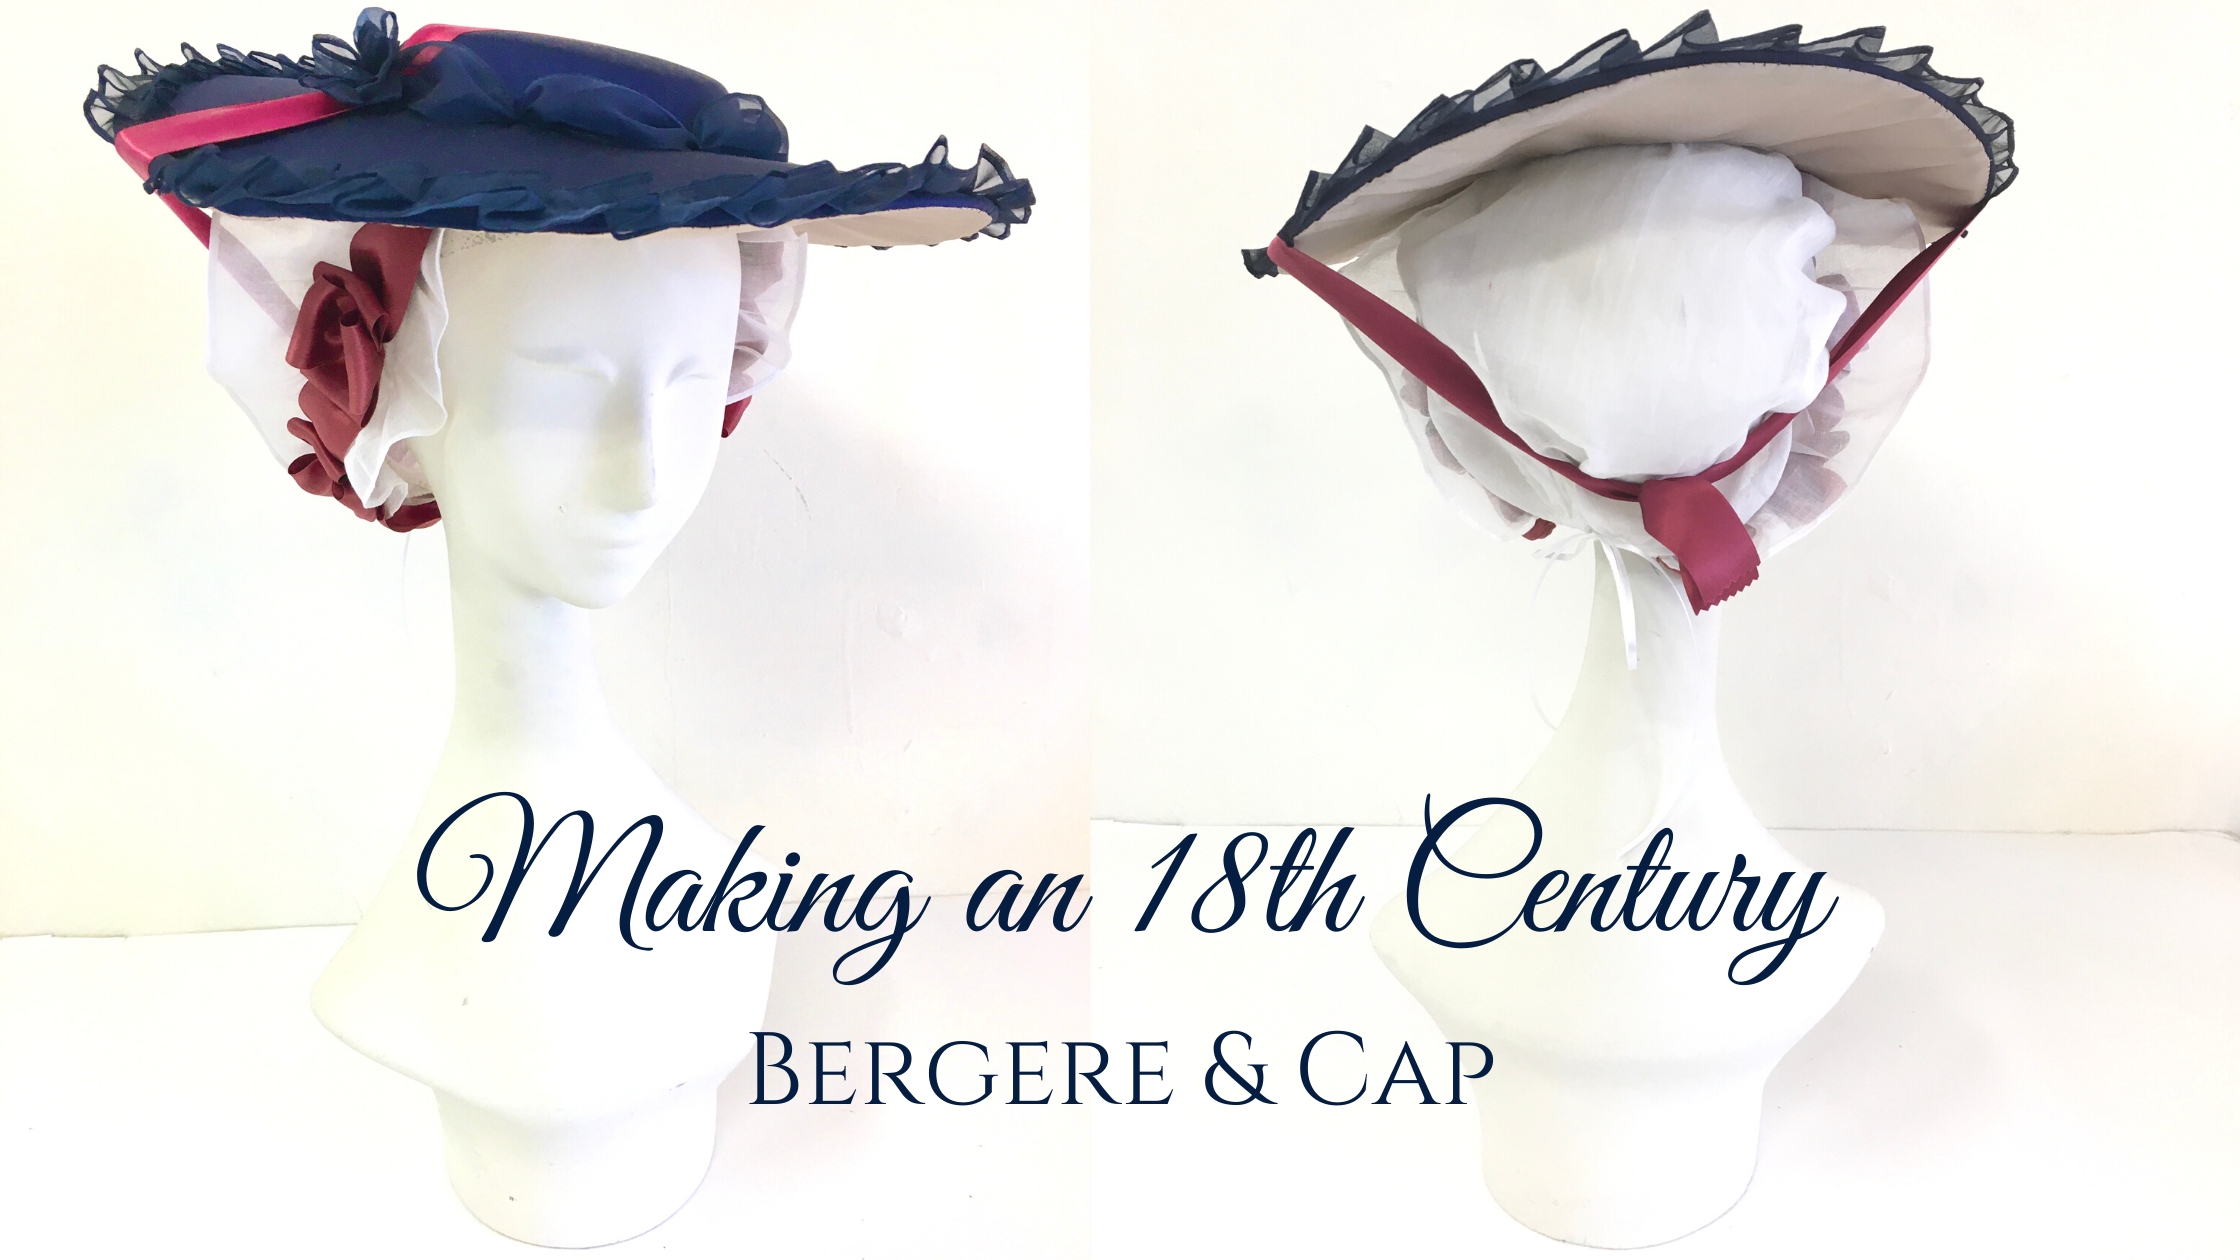
It’s always exciting to get to the stage in the costume making where I get to make a coordinating hat. And this project was no exception. I decided on a Bergere, which is French for Shepherdess, because, well, Bo Peep! I jest. But really, I do love the whole 18th century shepherdess look. I really chose this style because it was very popular in the 18th Century and it is very pretty as well as easy to wear. The style is also the base hat for two hats in the American Duchess guide to 18th Century Dressmaking which is where I got my inspiration for my 18th Century Italian Gown.
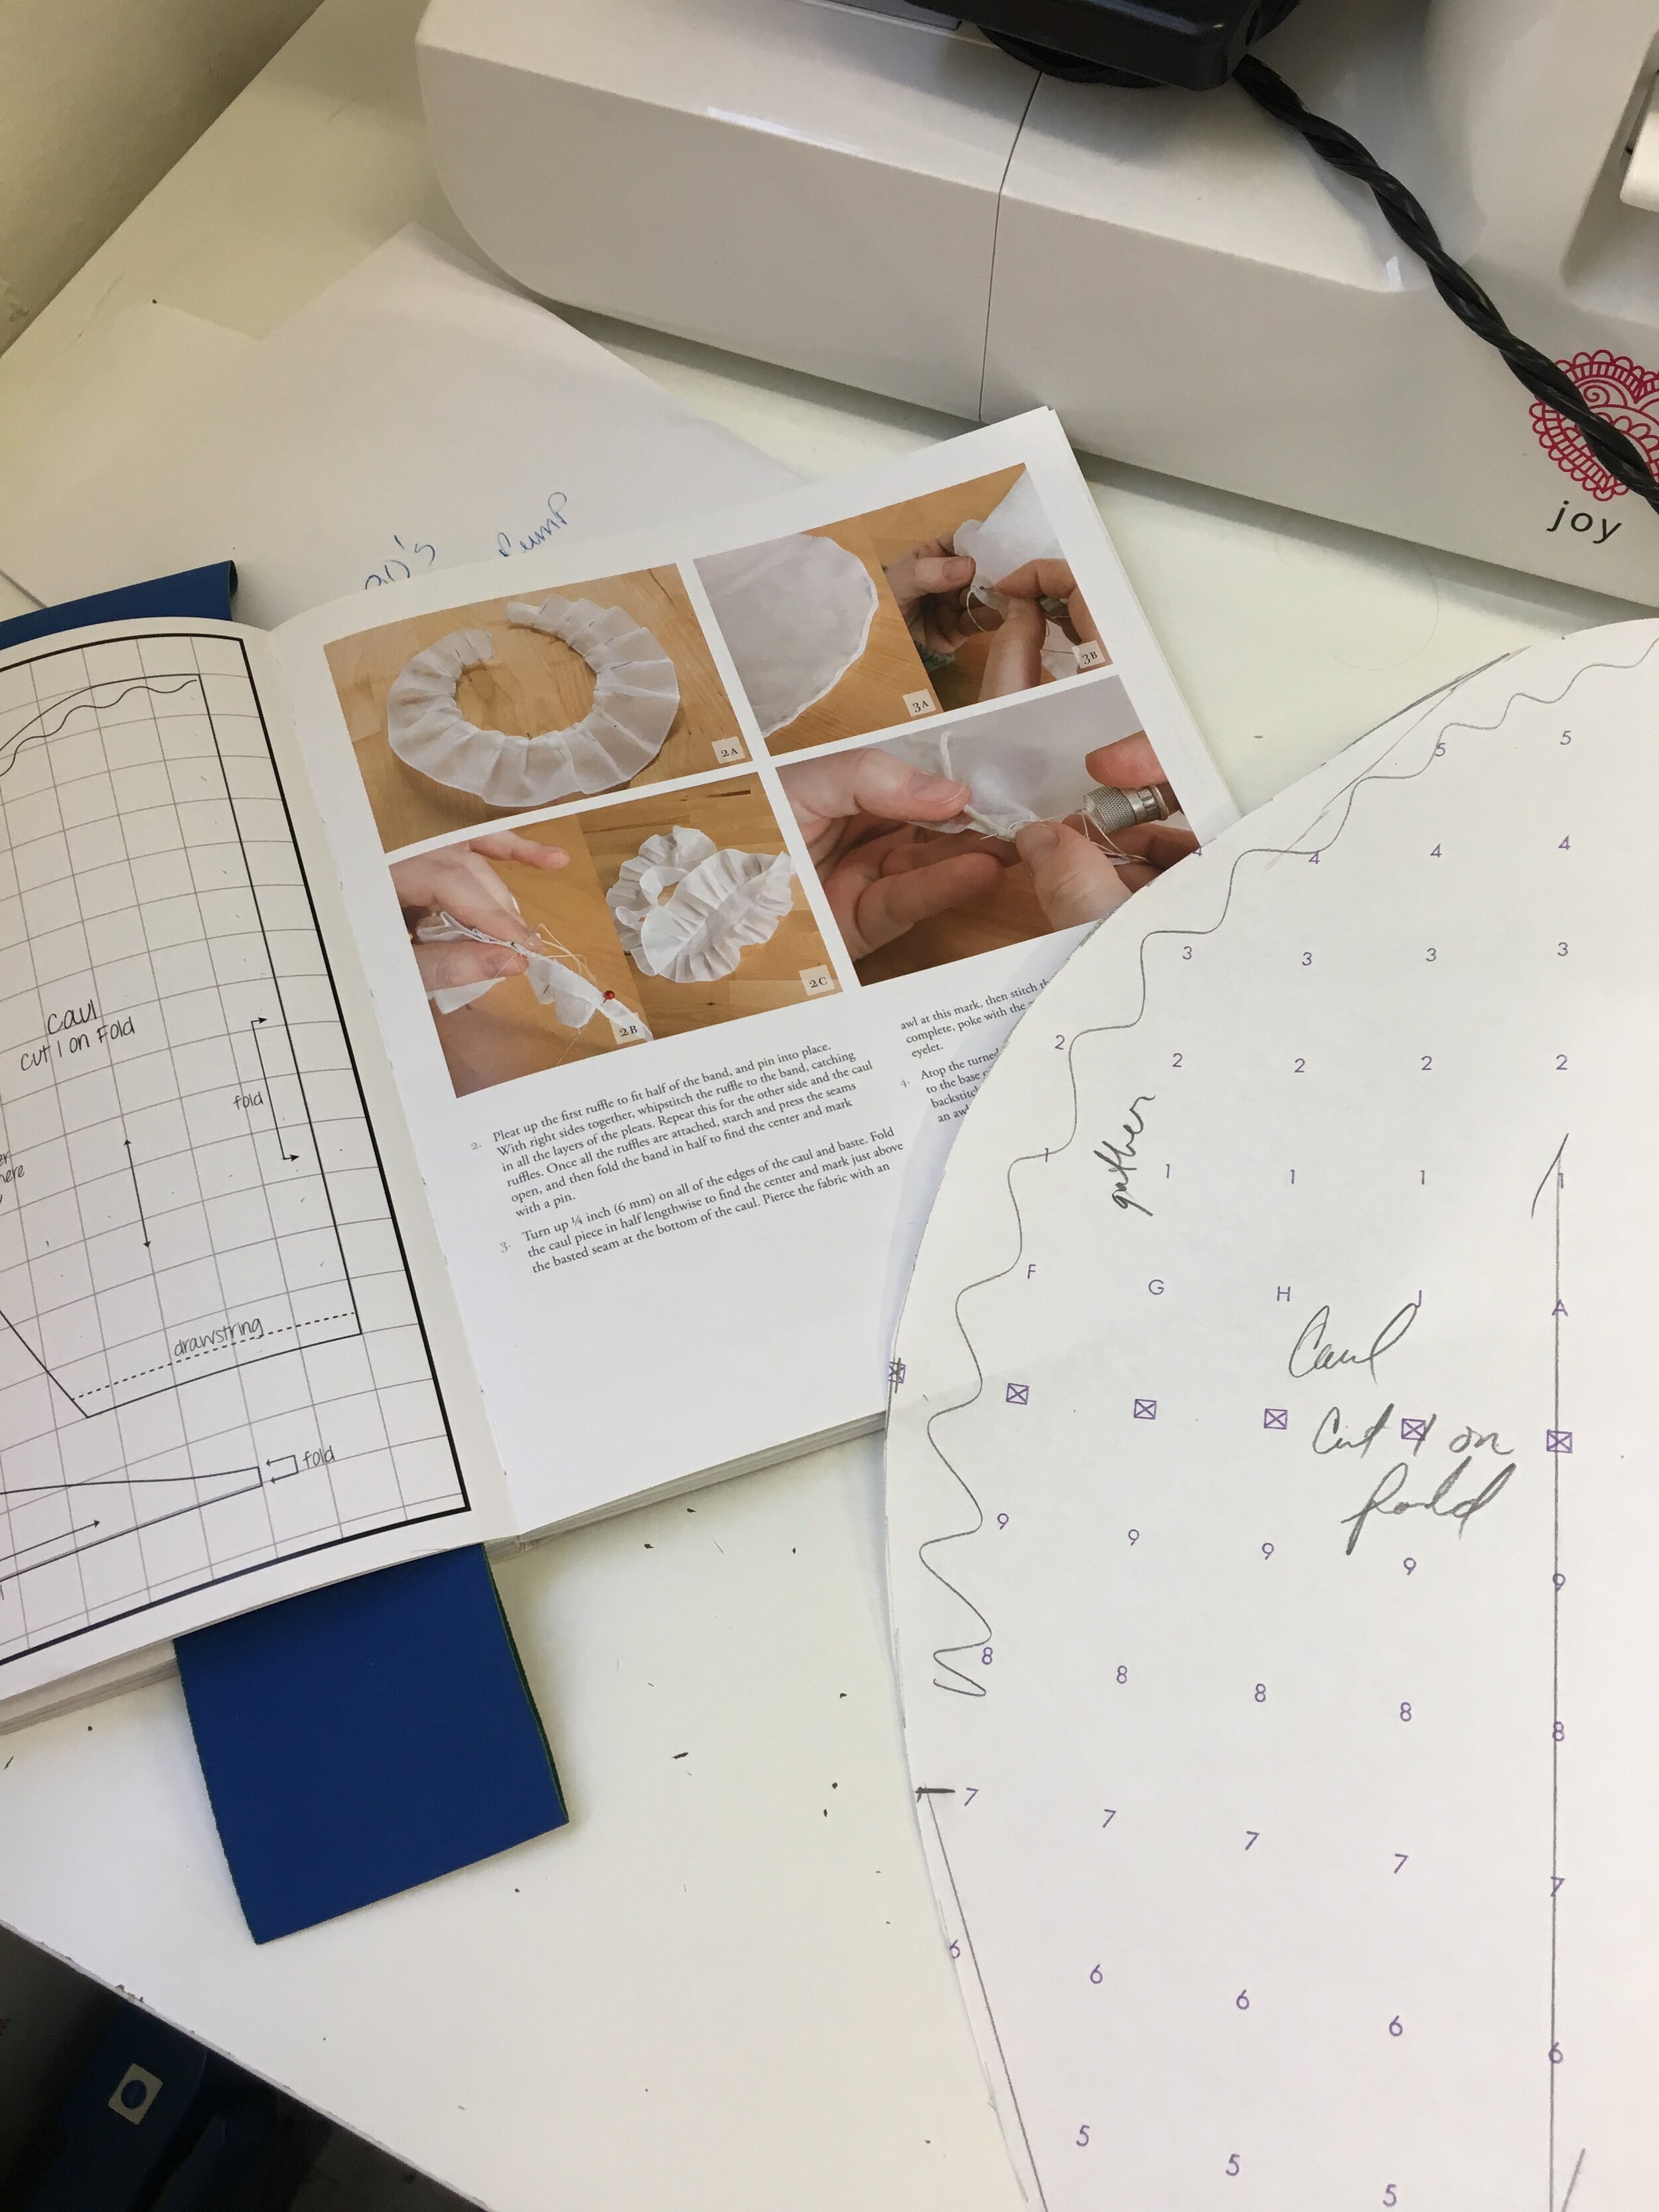
And apparently one also needs a cap to wear over one’s hair before putting the hat on. So, per the directions in the book, I went about constructing my cap. Entirely. By. Hand. I love making things by hand. It’s very relaxing. With this cap, the book suggests, hem stitching each of the pieces all the way around, before joining. Very, very time consuming. And then there is an hand done eyelet and drawstring in the back.
As I was making the cap, it was looking very small. You can see above, the band, which has ruffles on either side, is quite narrow at the top edge (less than 1/4”). I was beginning to think something went wrong.
And then there is an hand done eyelet and drawstring in the back. So cute and not as difficult as expected. Apparently it’s easy to spread apart the threads in cotton organdy.
Voila! All done, but WAY too small and way to poofy on TOP. I needed to make another. So I did. But first, I added seam allowance all the way around. I thought it was included in the pattern given, but it didn’t really work out without adding to it. I also added a 1/2” to the width of the Caul from top to bottom (that’s the main part of the cap) and added several inches to the length of each ruffle. I think I could even add more to the ruffle that attaches to the Caul. It just doesn’t quite stand up as ruffly as I would like.
After finishing the cap, I decided to add a ribbon and bows just like they do in the book. I really like the final look and can’t waist to put all the pieces together and wear it with my hat.
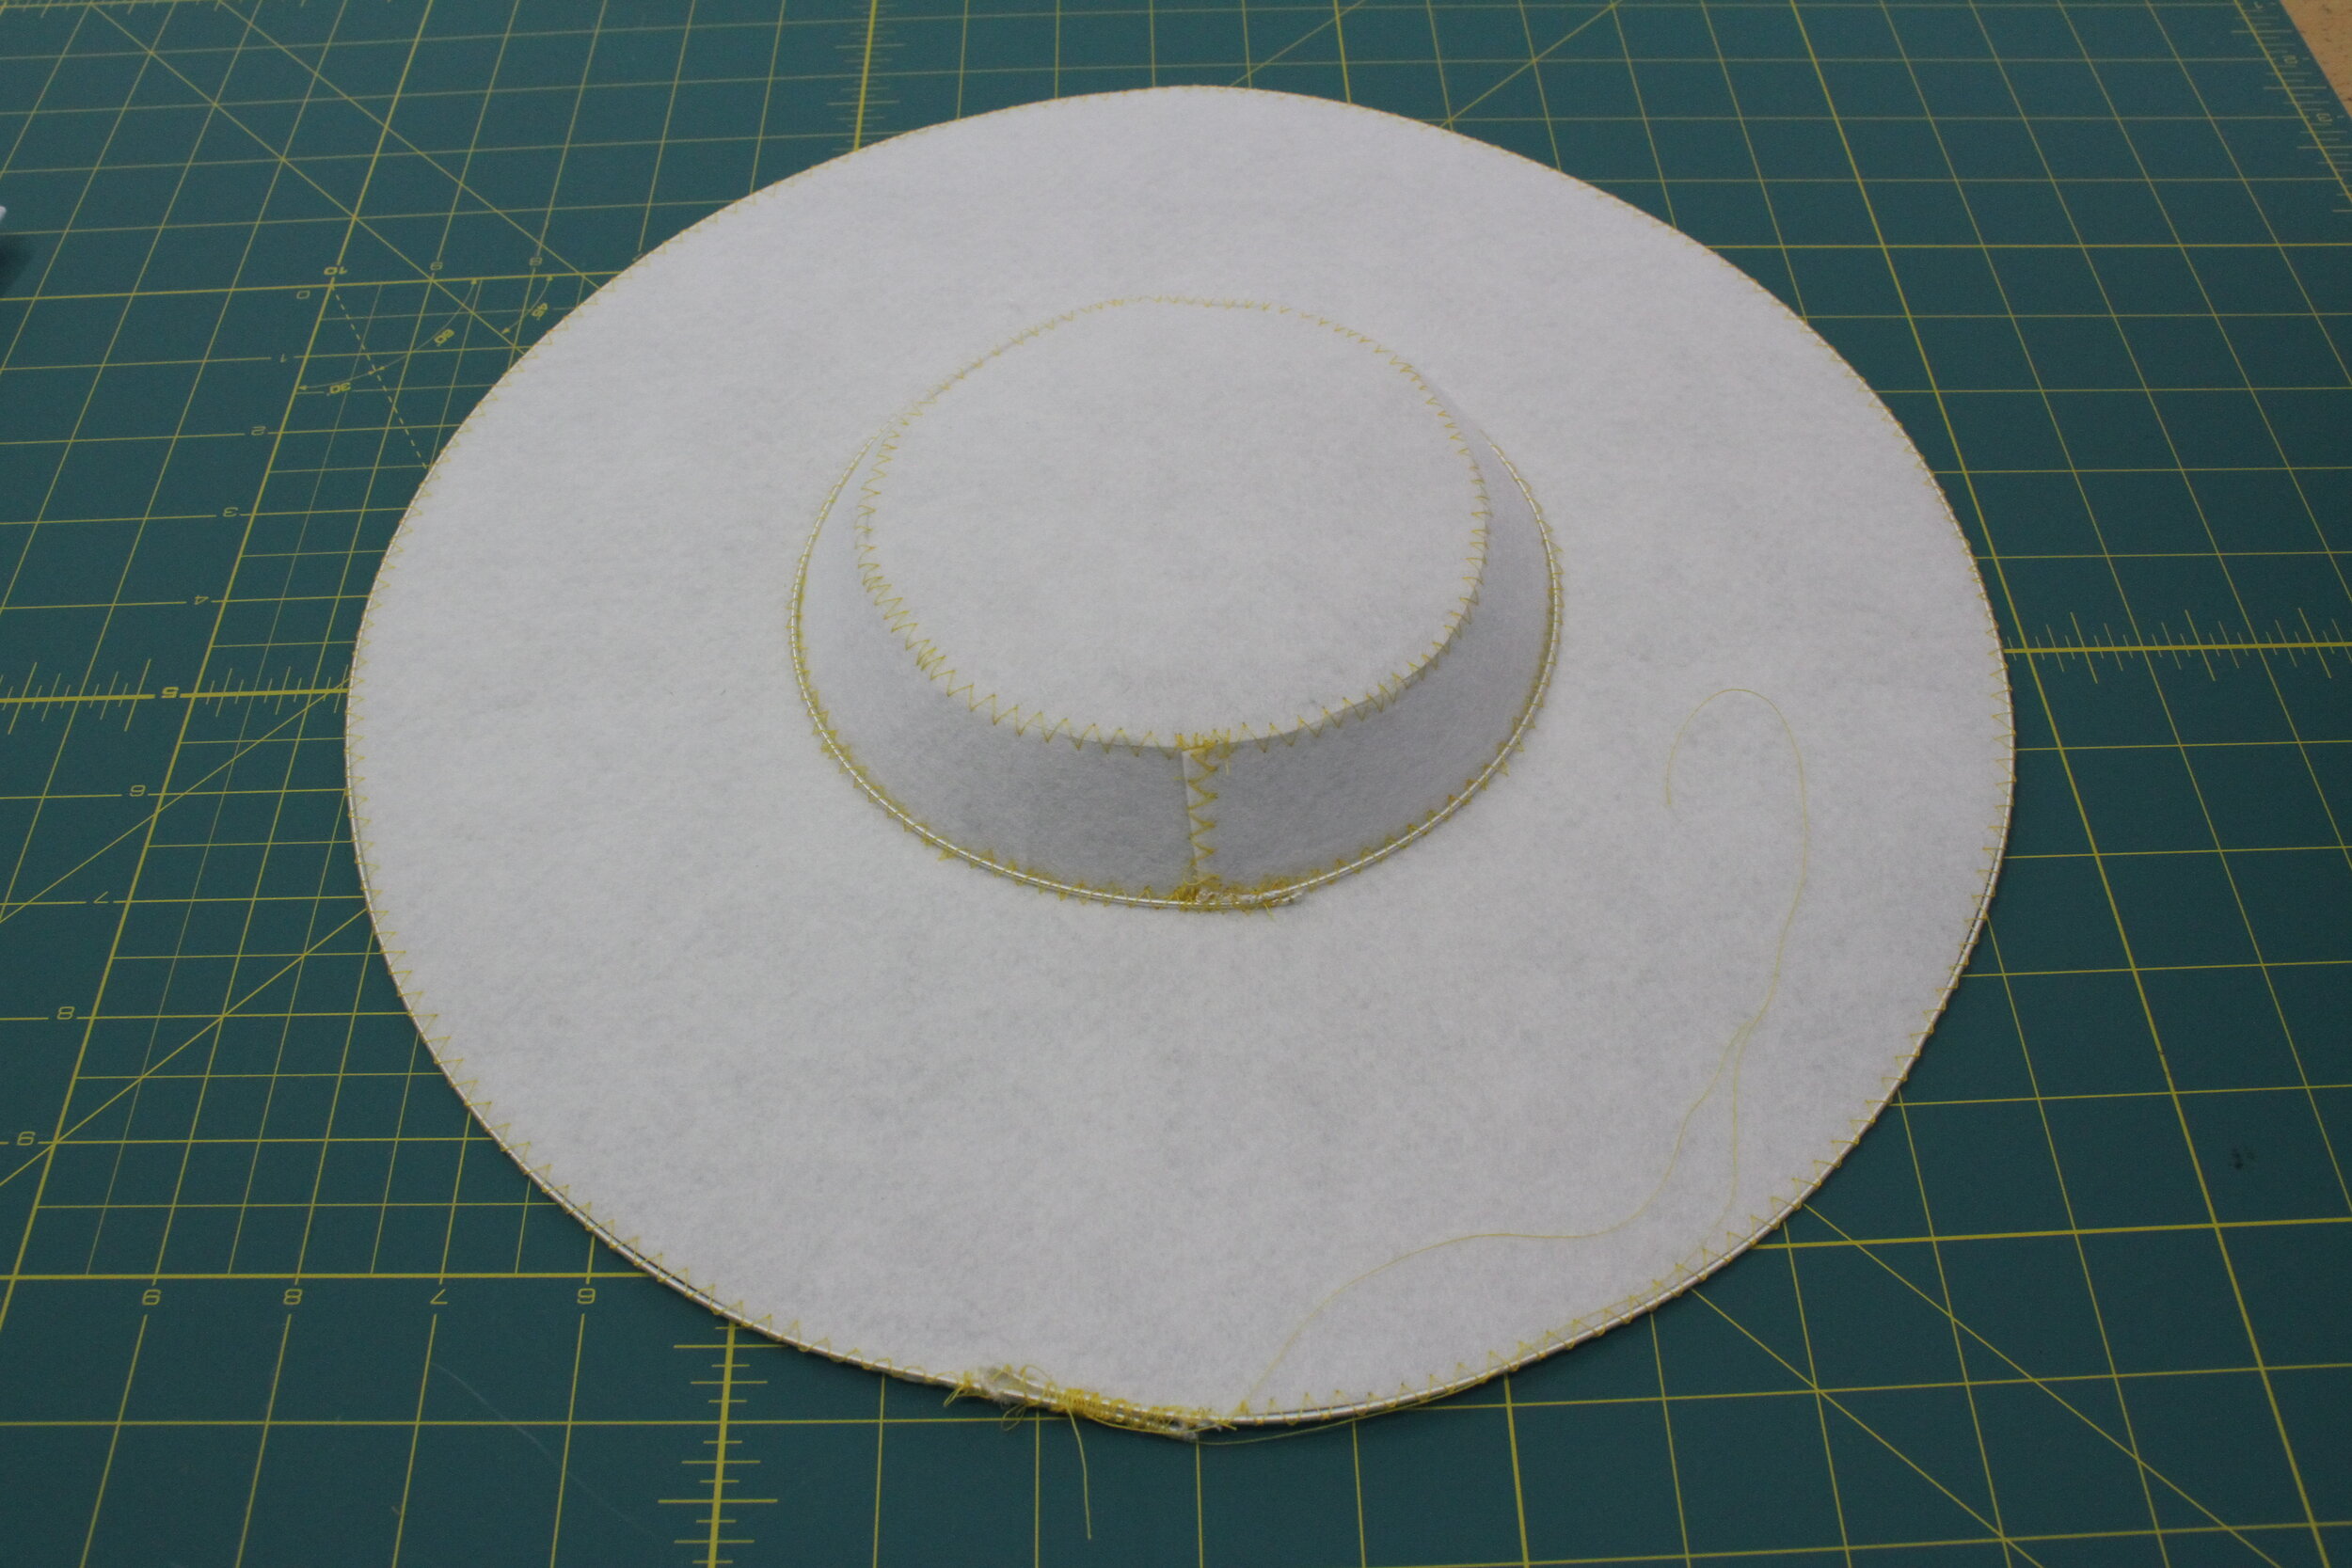
I did not have a pattern for a Bergere, so I made one. the diameter of the brim is about the 14” across and the crown about 5” in diameter. The base hat is made from Peltex or super heavy interfacing. It’s sewn together with the edges butted up next to each other using a zigzag stitch. it’s then finished with millinery wire sewn around the crown seam and around the outside edge of the brim.
The base hat frame is then covered with a thin layer of cotton batting. The batting is smoothed over the frame and pinned in place around the base of the crown before whip stitching the batting in place.
The batting is then smoothed out to the edges and wrapped around to the underside, where it’s pinned in place. At this point, the hat is then steamed with a normal iron, to smooth out wrinkles and excess folds of batting on the brim.
The batting is then trimmed and stitched to the brim along the underside. To finish the underside batting, a piece of batting is cut just smaller than the brim circumference as a circle and pinned onto the underside of the brim. With the batting from the outer brim and the batting from the inside brim, butted together and pinned in place, they are stitched in place, with a whip stitch.
Moving on to the inside crown, the batting is trimmed at the crown seam to allow for about 1/2” to fold to the inside and then stitched by hand, in place at the seam.
A small circle of silk is cut, about 2-3” bigger than the interior crown. Its pushed down into the crown, pinned in place and then stitched to the batting about 1/2” away from the crown seam with a running stitch.
To Start covering the outer crown I measured across the top of the crown from side to side and cut a piece of silk (my fashion fabric) in a circle about 2” bigger in diameter than that measurement. It was then smoothed evenly over the crown, pinned in place and stitched down, right at the seam, using a running stitch.
To cover the brim, I laid my pattern (from the base frame for the brim) on my silk and cut a piece with 1” seam allowance added all the way around and 1/2” seam allowance added at the interior crown opening. The seam allowance at the crown opening, was clipped and then pressed to the inside of the fabric.
It was then laid on top of the outer crown and pinned in place at the crown base. Then smoothed over the outer edges and pinned to the underside of the brim. the crown seam was slip stitched in place and the brim was whip stitched to the batting. Next up - adding the lining.
To create a lining piece, I cut a piece of silk just 1/8” bigger than the hat brim pattern piece all the way around, with no hole cut in the center. I folded back and pressed the edge of the circle 1/4” and pinned and stitched in place around the outer edge of the underside on the brim with a slip stitch. A small circle was then cut from the interior of this piece, the seam allowance folded back and stitched in place with a slip stitch. At this point the base hat was complete and it was time to trim the hat.
In the book, it showed a beautiful pleated organza edge on one of the hats, that I thought to recreate for this one. I cut three lengths of navy silk organza, 1 3/4” wide x the wide of the fabric. Each edge was clean finished with an 1/8” hem and stitched by machine. I just could not do that part by hand. it was just under 150” for all three lengths and then done on both sides. The strips were pleated and pinned right onto the hat and stitched down, by hand, with a running stitch.
I had a lovely red silk ribbon that was scrunched and tacked onto the crown at each side.
And with my remaining organza strip, I made a garland with gathered stitching in several inch increments all the way around the crown.
This hat was really fun to make and did not take quite as long to finish as some of the bonnets I’ve made in the past. It seems I cannot stop making hats however, as I have several in the works for a Regency Bonnet Class I’m teaching next month. My early hat designing life is catching up with me. Let me know if you are interested in hearing about my hat business, Ask-In Designs, that I had in SF in the late 1980’s and early 1990’s. It was kind of wild and crazy in a teacup-on-your-head sort of way……
Until Next Time, Happy Sewing!
xo Jennifer


