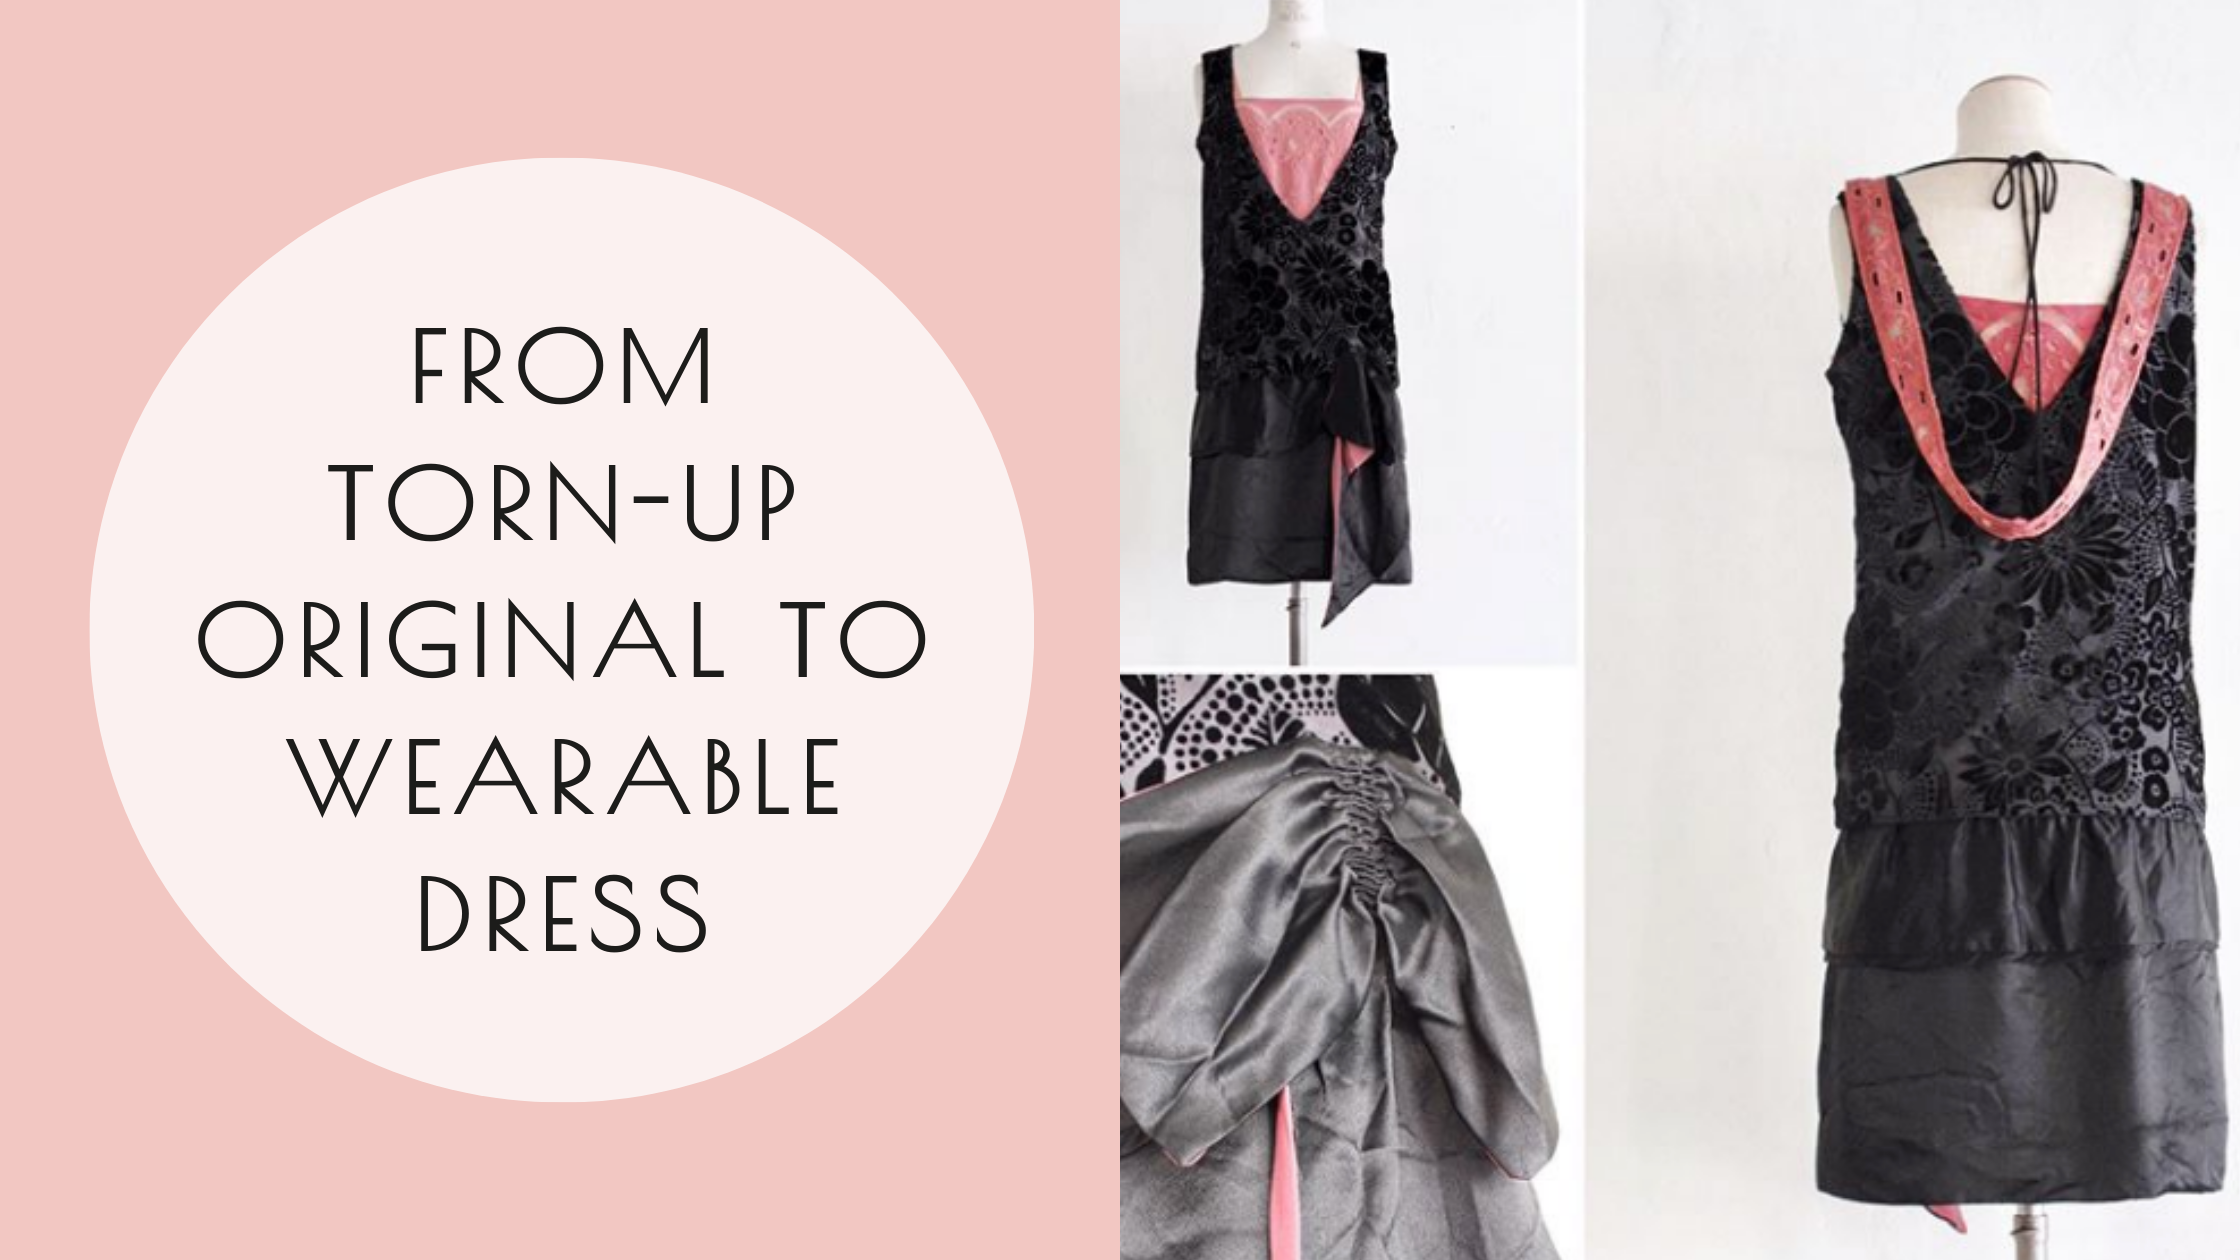
First, I’ll start out by saying that I believe vintage textiles are special but not necessarily precious. They are something we should treasure but that we should also use. This is a somewhat controversial point of contention between archivists, historians and collectors when it comes to clothing, especially historic clothing that marks an era in time. Some feel that they should be put away for posterity and preserved for history’s sake. Others feel that they should be worn and treasured personally. I’m kind of in both minds about this, , depending on the garment. However, my own line is drawn when a garment will likely go into the landfill, because someone deems it unwearable for whatever reason - in this case, deteriorating and falling apart. I’m SUPER-NOT into the landfill. My hope is that we can re-use parts of garments that are falling apart and that will extend the life of the original textile.
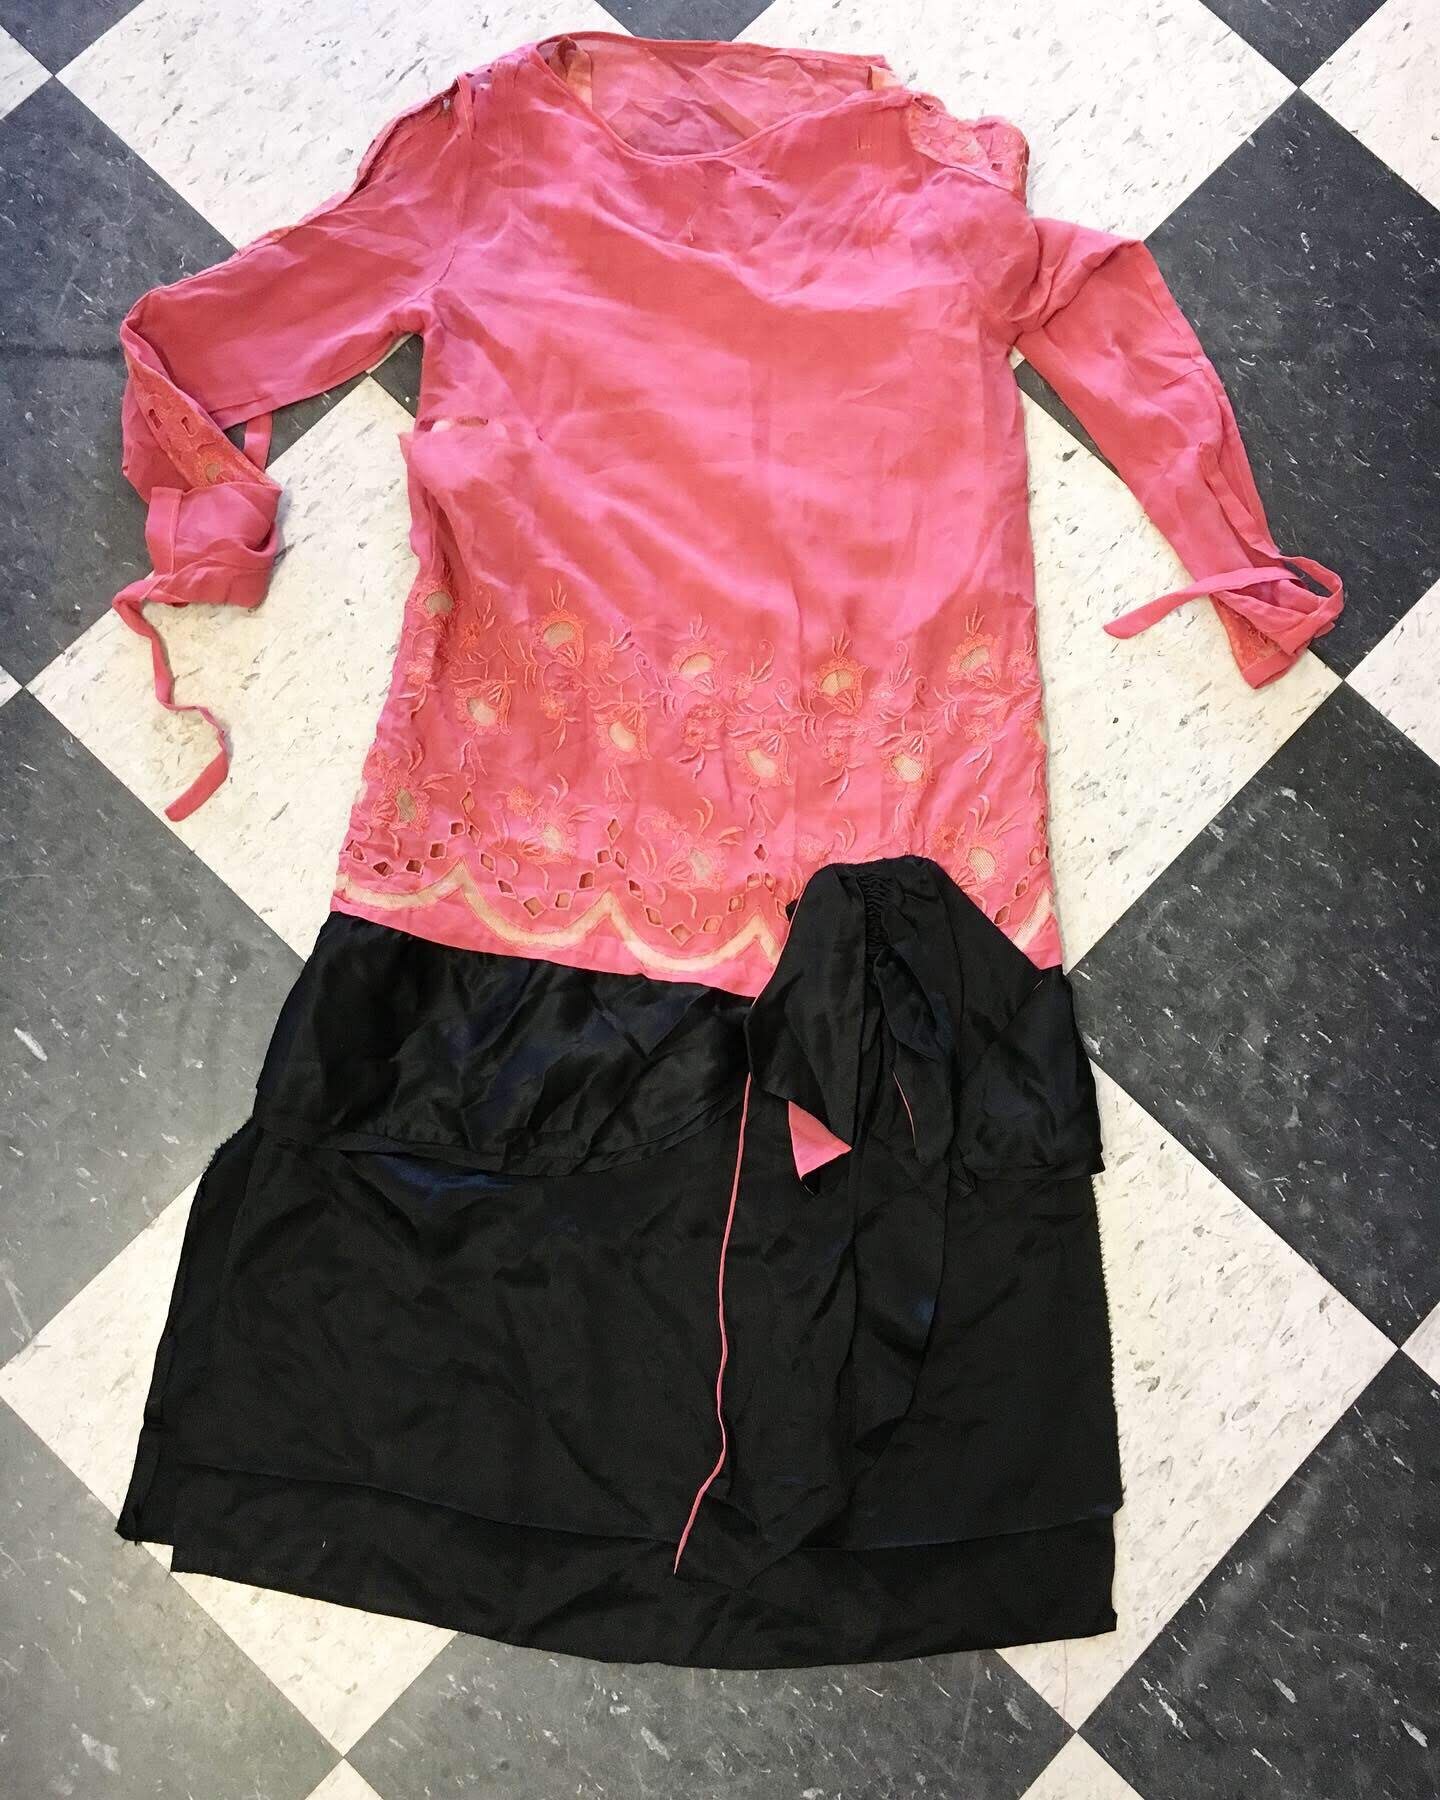
Sometime last year, I found a gorgeous yet very dilapidated, rose and black embroidered dress from the 1920’s. I was at the Alameda Antique Faire and was waylaid at Jennifer Osner’s booth, engrossed in all her antique textiles, laces, trims and ribbons. This dress (see below) was in a plastic bag and upon discovery, I knew I needed to rescue it.
Look at that gorgeous embroidery! Going down each arm and also around the waistline. On first sight it looked pretty good, but after closer inspection I found that the silk chiffon was tearing in the arm, neck and along the side. It was very visible and almost impossible to mend . The seams on the skirt were also coming apart. There is also the matter of size (not mine) but I still fell hard and bought it after careful deliberation.
It took me a few months to get inspired as to what I could do and how I could change it. When I was ready, the first thing I did was deconstruct it from top to bottom.
The bottom edge of the slip had quite a few holes. I managed to find a piece of silk in my scrap bin that was a very similar color, and used it to cover the holes with a band of fabric along the bottom edge. This made it stronger and more stable.
You can see how I mended the Slip over on my Instagram IGTV. And more about the skirt and back drape HERE.
Before deconstructing the blouse part of the dress, I traced off the Front, Back and Sleeves. At this point, I hadn’t decided what the finished dress would look like. I needed actual patterns that fit together, so I had somewhere to start from when I did figure that out.
The sleeves were pretty shattered so I took those apart first. Each sleeve had a strip of embroidered silk chiffon down running from the shoulder to the cuff. When these were both free of their sleeves I put them aside for later use.
from the Goldstein Museum
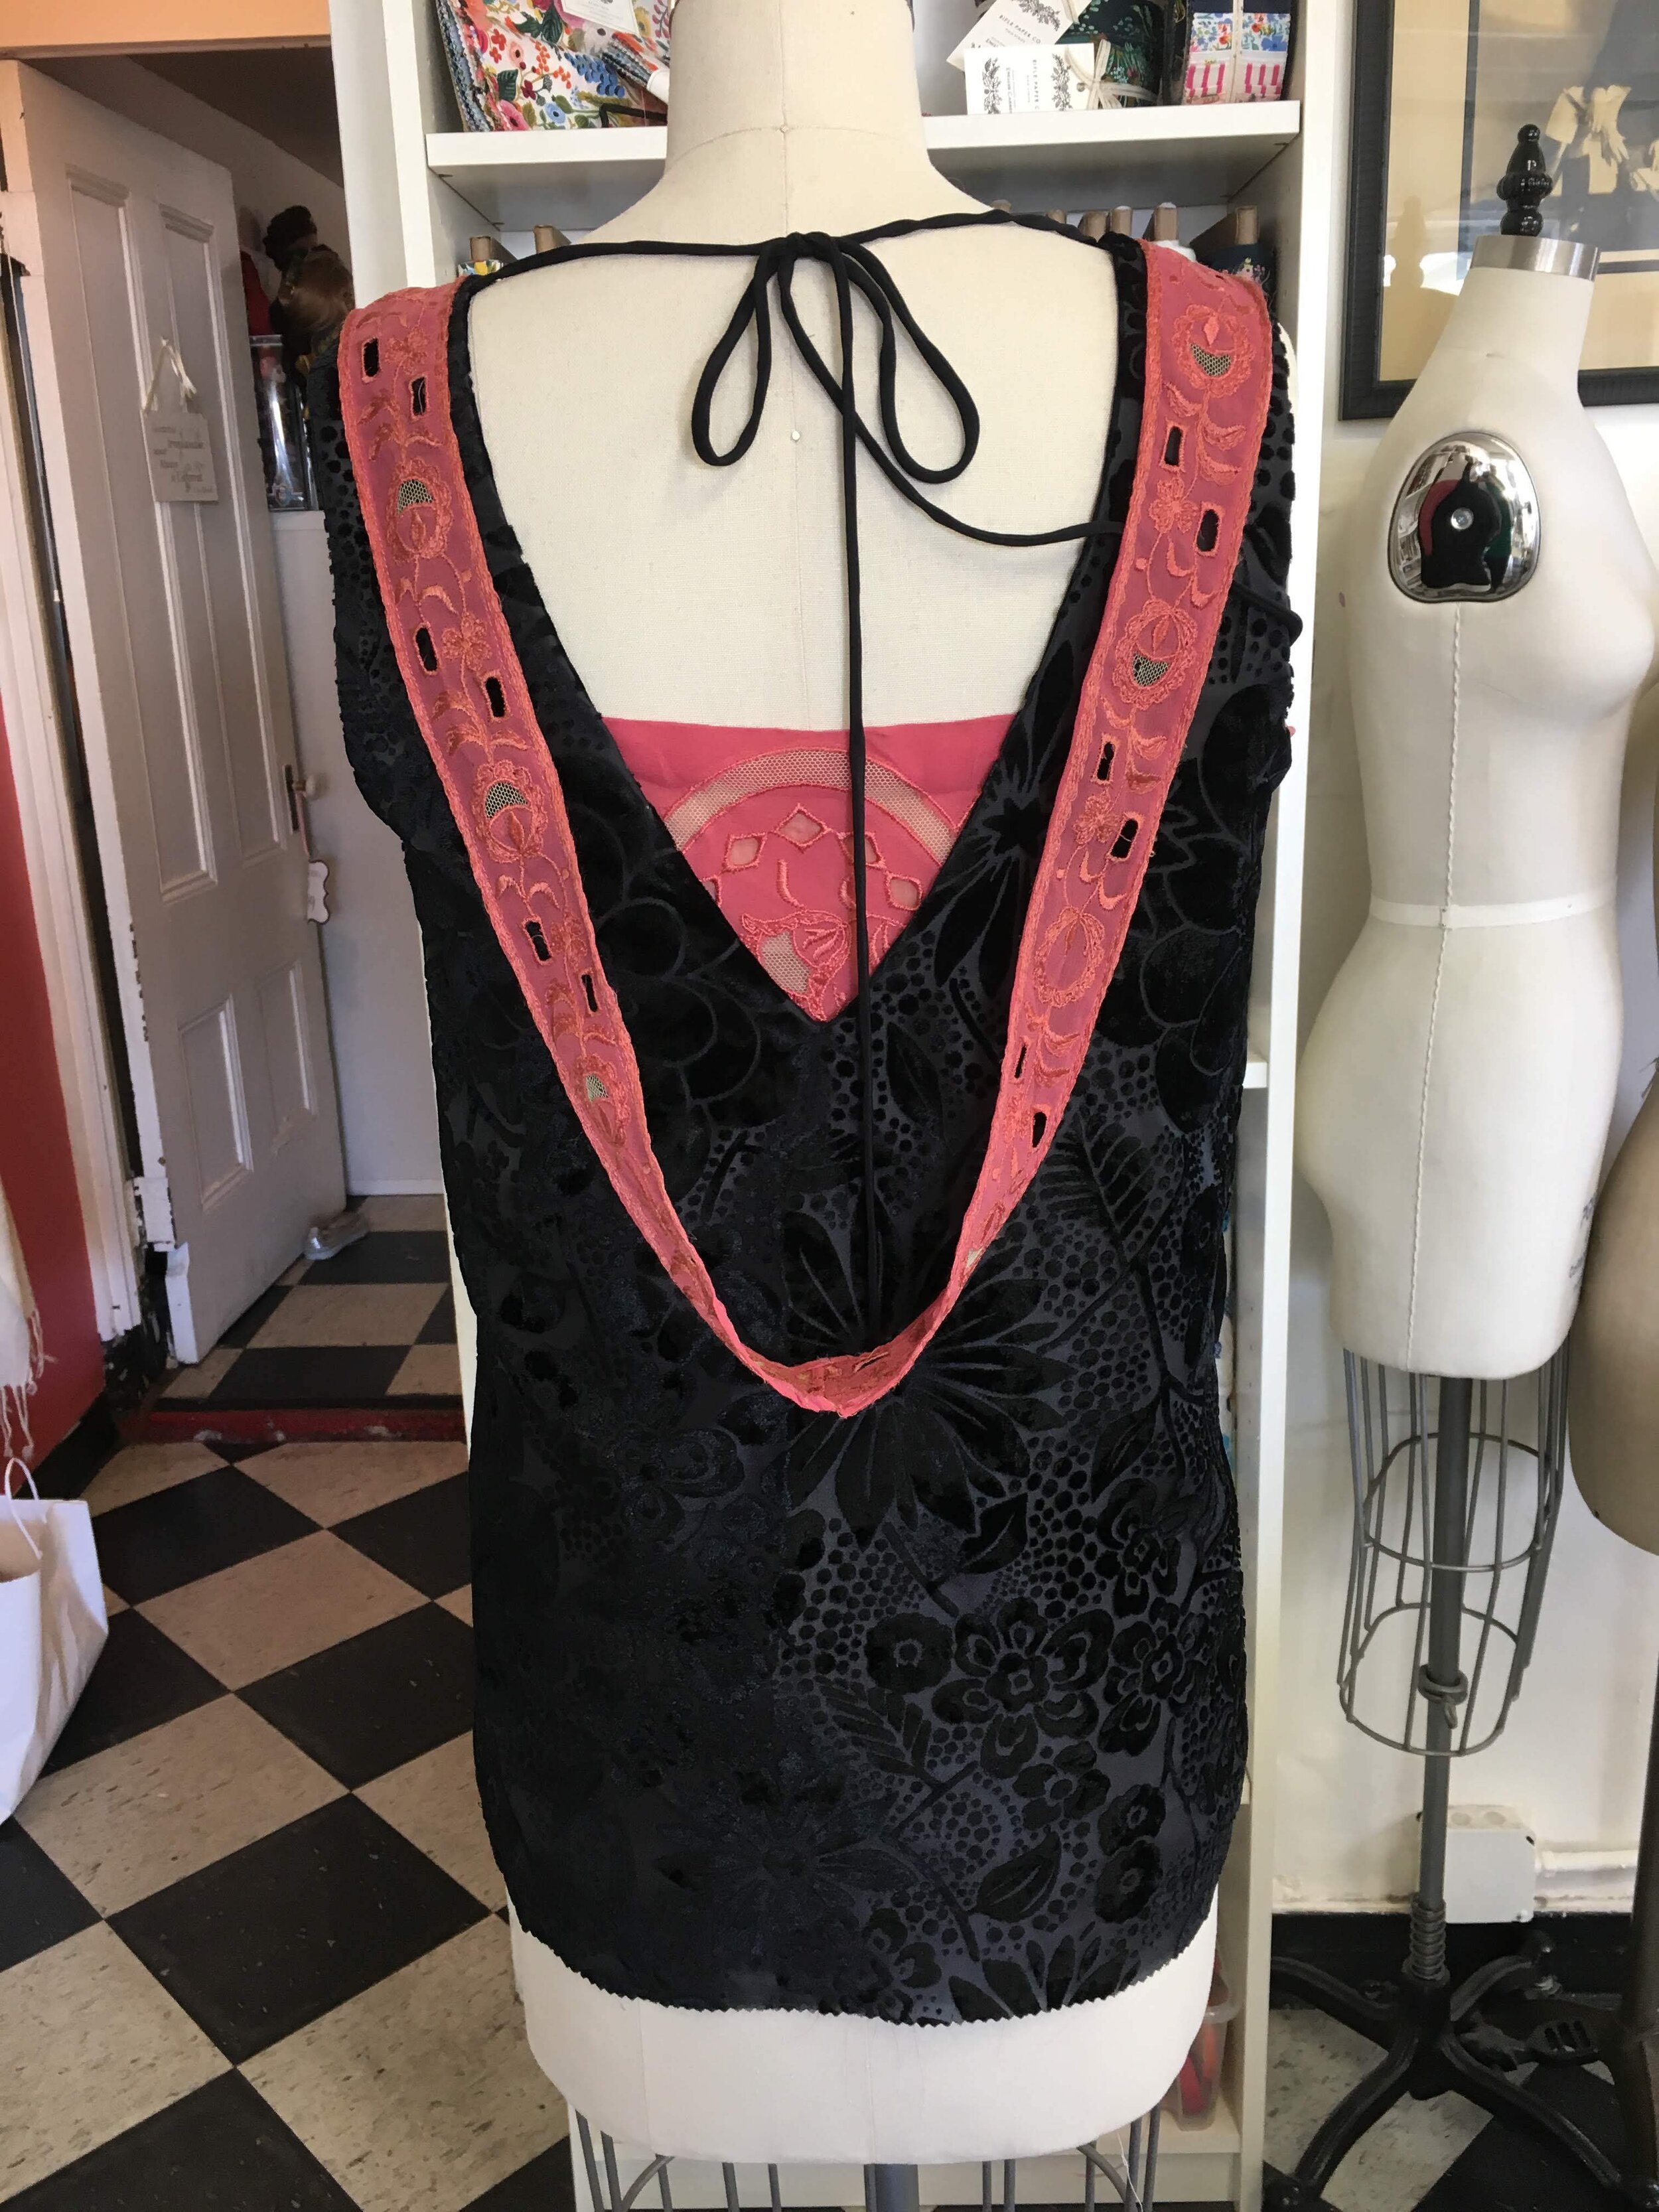
After a little perusing on Pinterest, These two images came up as examples of dresses with either a lace or embroidered drape down the back of the dress. That struck me as a delightful detail and knew I could use those two sleeve strips to create a similar look.
After salvaging the embroidery from the blouse, I turned the embroidered part of the blouse upside down and stitched it directly to the slip. The slip now had the embroidery but it didn’t reach the waist. It wasn’t quite as modest, or as finished, as the original and I didn’t really want it to show as a slip. I had a piece of black burnout velvet in the back room.of the shop that I thought would be great as a new bodice/blouse. When put next to the dress, they all looked really good together. So I drafted a pattern for a sleeveless tunic with a deep v neck in both the front and the back.
The two sleeve embroidered pieces were sewn together and finished by hand on the inside edges. I sandwiched the two ends between the shoulders and added a skinny silk tie between the shoulders to stabilize them.
I made a video that might clarify how I handled the finishing of the bodice and you can see it a bit more close up in the photos below.
After the bodice was complete, I moved on to the skirt. The side seams needed stitching, it needed to have the hem re-stitched and it needed a good press. I still couldn’t get out all the wrinkles. Ugh. After the skirt was complete, the two pieces were sewn together and the bow re-attached along the waist.
I’m really happy how this turned out. There are a few different avenues I could have traveled to complete this project, but I’m thrilled to have used supplies on hand and inspiration from dresses of the era. The dress was definitely not my size so I put it on Etsy and found a new home for it. The cost of the original dress was $50 and I sold it for $125. A few dollars were made, but the fact that it will see another life is far more valuable.
Jennifer Osner (The vintage and antique textile wizard) has Four Etsy shops. Since she is probably not selling much in person, so I’m sure she could use your support and if you shop via these links, I make a few cents too.
Until Next Time, Happy Sewing!
xo
Jennifer


